
To reduce airborne dust while vacuuming for allergies, start by clearing clutter and moving furniture to guarantee thorough access. Prioritize high-traffic and dust-heavy areas first, using tools like HEPA filters and suitable attachments for each surface. Vacuum from the top of the room downward to trap dust before it settles. Maintain your equipment and follow post-cleaning steps like opening windows and wiping surfaces. Keep going to discover more effective techniques for allergen control.
Key Takeaways
- Begin by clearing clutter and moving furniture to access all surfaces thoroughly.
- Prioritize vacuuming high-traffic, dust-heavy areas first to remove major allergen sources early.
- Use appropriate attachments and adjust settings to vacuum from top surfaces downward, preventing dust redistribution.
- Regularly clean or replace filters and empty the vacuum to maintain optimal allergen trapping capability.
- After vacuuming, open windows, wipe surfaces, and use air purifiers to reduce residual airborne dust.

USANOOKS Microfiber Cleaning Cloth Grey - 12 Pcs (12.5"x12.5") - High Performance - 1200 Washes, Ultra Absorbent Microfiber Towel Weave Grime & Liquid for Streak-Free Mirror Shine - Car Washing Cloth
10x GRIP-ROOT WEAVE - TRAP MORE, WORK LESS: Ultra-absorbent microfiber towels for car Grip Root weave works like...
As an affiliate, we earn on qualifying purchases.
Preparing Your Space Before Vacuuming

Before you start vacuuming, it’s important to prepare your space to minimize allergens and guarantee a thorough clean. Begin by turning on your air purifier usage to filter airborne particles during vacuuming. This helps reduce dust and allergens in the air, making the process more effective. Cover your furniture and mattresses with allergen proof covers to prevent dust mites from escaping and settling back into the environment. Remove any loose items or clutter from the floor to allow your vacuum cleaner to reach all surfaces efficiently. Clearing the area ensures you don’t miss spots and reduces the risk of spreading allergens into the air. Additionally, ensuring proper appliance care and maintenance, such as checking for filter cleanliness and proper sealing, enhances the vacuum’s efficiency. Regularly inspecting and replacing vacuum filters improves dust collection efficiency and prolongs the lifespan of your equipment. Maintaining optimal vacuuming techniques and adhering to proper appliance care practices are crucial for a healthier indoor environment and maximizing your vacuum’s performance. Incorporating preventive maintenance routines can help keep your vacuum operating at peak performance over time.

Amazon Basics Microfiber Cleaning Cloths, Ultra Absorbent, Lint Free, Streak Free, Non-Abrasive, Reusable and Washable, 16" x 12", Blue/White/Yellow, Pack of 24
Microfiber 16 x 12-inch cleaning cloth (24-pack); ideal for cleaning cars, trucks, boats, and more
As an affiliate, we earn on qualifying purchases.
Clearing Clutter and Moving Items Out of the Way
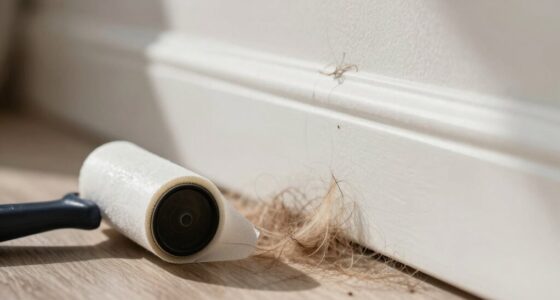
Why is clearing clutter so essential before vacuuming? Clutter organization helps guarantee your vacuum can reach every surface, preventing dust from hiding under items. Moving furniture and belongings out of the way allows for a thorough clean and reduces the risk of spreading dust into the air. Use effective storage solutions to keep small items off the floor and organized, making your space easier to clean regularly. Proper water management can also reduce dust buildup and improve indoor air quality. Additionally, organizing your belongings helps minimize cross-contact of allergens between different areas. Being mindful of airborne dust levels during cleaning can significantly improve indoor air quality and allergy symptoms. Implementing vacuum maintenance routines, such as replacing filters and brushes, further enhances dust removal efficiency. Proper air circulation practices can also help disperse dust particles and prevent accumulation. Here’s a quick guide:
| Item to Move | Storage Solution |
|---|---|
| Books | Shelves or boxes |
| Toys | Toy bins or baskets |
| Clothes | Closet or laundry baskets |
| Decor | Shelves or wall hooks |
| Small Items | Drawer organizers |
Clearing clutter boosts vacuum efficiency and minimizes airborne allergens.

10 Pack Microfiber Cleaning Cloths, Large 30" x 16" Absorbent Streak Free Lint Free Washable Reusable Towels for Floor Mop, Kitchen, Car, Windows, Glass, Stainless Steel, Multi-Purpose Rags, Blue
EXTRA LARGE SIZE: Each microfiber cleaning cloth measures a generous 30" x 16", providing more coverage for faster,...
As an affiliate, we earn on qualifying purchases.
Vacuuming High-Traffic and Dust-Heavy Areas First

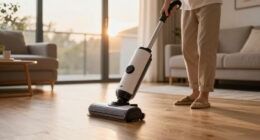
Start by vacuuming high-traffic areas first, since they collect the most dust and allergens. Tackling dust-heavy spots early helps eliminate the biggest sources of airborne particles. This approach guarantees you get the most out of each cleaning session and improves overall allergy relief. Additionally, using proper vacuuming techniques can ensure that dust and allergens are effectively captured rather than redistributed into the air. Incorporating vacuum cleaner features like HEPA filters can further enhance dust and allergen removal. Employing connected cleaning technology can also optimize your vacuuming schedule for maximum allergen reduction, especially when paired with smart scheduling to target problem areas more efficiently. Understanding accessory choices can help you select tools that reach tight spaces and improve overall cleaning effectiveness.
Prioritize High-Traffic Zones
Have you ever noticed how dust and allergens tend to gather in the busiest parts of your home? Prioritizing these high-traffic zones guarantees you remove the most dust and allergens first, reducing airborne particles quickly. Start with areas like entryways, living rooms, and hallways, where foot traffic stirs up dust. Use a vacuum with a good vacuum filter to trap allergens effectively. Also, maintain clean storage organization to prevent dust buildup in cluttered spaces. Regularly vacuuming high-traffic zones ensures ongoing removal of dust and allergens, maximizing your cleaning efforts. Incorporating visual and auditory cues can also assist in monitoring the effectiveness of your cleaning routines. Proper ventilation considerations can also help reduce indoor allergen levels. Here’s a quick guide:
| Zone | Action |
|---|---|
| Entryways & Hallways | Vacuum thoroughly, focus on corners |
| Living Rooms | Cover furniture and rugs |
| High-Traffic Areas | Repeat regularly for best results |
Focusing on these zones first maximizes the effectiveness of your vacuuming routine.
Tackle Dust Accumulation First
Since dust and allergens tend to settle quickly in high-traffic and dust-heavy areas, tackling these zones first guarantees you eliminate the most buildup early on. Prioritizing these spots improves air quality by reducing the amount of airborne dust that can circulate during cleaning. When you focus on dust-heavy areas first, you prevent allergens from becoming re-suspended in the air as you move through your space. This strategic approach enhances allergen control, especially in rooms where people spend a lot of time. By removing the thickest layers of dust early, you ensure subsequent vacuuming is more effective. Additionally, understanding the order of operations can help you develop a more efficient cleaning routine. Using the right vacuuming techniques can further minimize dust dispersal and maximize removal efficiency. Incorporating proper dust containment methods helps prevent dust from spreading beyond the targeted areas. Employing effective air filtration during and after vacuuming can further improve indoor air quality. Moreover, selecting the appropriate vacuum cleaner models can significantly impact dust removal efficacy. Overall, cleaning these areas first helps create a healthier indoor environment, making your entire vacuuming routine more efficient and improving air quality for everyone.
Maximize Dust Removal Efficiency
Focusing on high-traffic and dust-heavy areas early in your vacuuming routine guarantees you remove the majority of stubborn dust and allergens before they become airborne again. To maximize dust removal efficiency, prioritize these zones first. This approach allows you to optimize airflow and ensures your vacuum’s filter selection captures more particles. Proper airflow optimization prevents dust from escaping during cleaning, while choosing the right filter enhances allergen filtration. Use a high-efficiency particulate air (HEPA) filter for better results. Consider adjusting your vacuum’s settings for maximum suction. Always work in overlapping passes to avoid missed spots. Regularly empty the dustbin or replace filters to maintain peak performance. Additionally, understanding the importance of filtration systems can help you select and maintain equipment that truly reduces airborne allergens. These steps ensure you effectively target dust-heavy areas, reducing airborne allergens and improving indoor air quality.
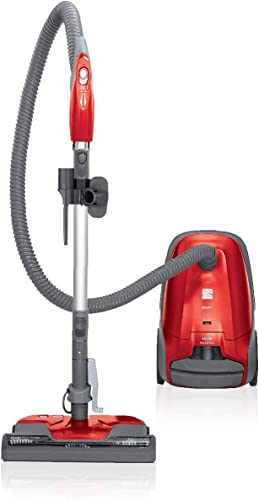
Kenmore 81414 400 Series Pet Friendly Lightweight Bagged Canister Vacuum with Extended Telescoping Wand, HEPA, Retractable Cord, and 4 Cleaning Tools-Red
BAGGED CANISTER VACUUM: Designed to clean all areas and surfaces of your entire home, den, kitchen, car or...
As an affiliate, we earn on qualifying purchases.
Using the Right Attachments and Techniques for Different Surfaces

Choosing the right attachments and techniques is essential for effectively cleaning different surfaces and minimizing allergens. Using appropriate attachment techniques guarantees you remove dust without damaging delicate materials. For upholstery, use a soft brush or upholstery tool to loosen dust particles gently. When cleaning hardwood or tile floors, opt for a wide nozzle or bare-floor attachment to avoid scratching surfaces. Carpeted areas benefit from a motorized brush or beater bar to lift embedded dirt. Surface specific methods include adjusting suction levels and angles to reach into tight corners or under furniture. Always confirm you’re using the correct attachment for each surface, as it maximizes dust removal and reduces allergen spread. Tailoring your approach makes your vacuuming more efficient and allergen-free.
Vacuuming From Top to Bottom for Maximum Dust Removal

Start vacuuming from the top of your room to remove dust before it settles lower. This approach prevents cross-contamination and guarantees dust doesn’t spread back into the air or onto cleaned surfaces. By following this method, you’ll maximize dust removal and improve your indoor air quality.
Remove Dust Settlements First
To effectively remove dust, begin by targeting the areas where it naturally settles first. Dust settlement occurs on surfaces first, then becomes airborne particles that circulate in the air. Removing these settled deposits prevents them from becoming airborne again during cleaning. Start with high surfaces like shelves, ledges, and ceiling fans. Don’t forget furniture surfaces, window sills, and light fixtures. Clearing dust from these spots reduces the overall dust load in your environment.
- High shelves and ceiling fans
- Light fixtures and vents
- Window sills and ledges
- Top of furniture and cabinets
- Corners and edges where dust accumulates
Prevents Cross-Contamination
Vacuuming from top to bottom is essential to prevent cross-contamination and guarantee maximum dust removal. By following this order, you control airflow patterns, ensuring that dust and allergens don’t settle or spread to cleaner areas. Starting at higher surfaces like ceilings and shelves prevents dislodged particles from falling onto already cleaned floors. Using the right filter types, such as HEPA filters, traps tiny particles and prevents them from recirculating into the air. Moving downward minimizes the risk of redistributing dust, maintaining a cleaner environment. Proper technique maximizes vacuum efficiency and reduces airborne allergens. This systematic approach keeps dust contained and ensures your vacuuming effectively improves indoor air quality, especially important for allergy sufferers.
Employing Proper Vacuum Cleaner Settings and Maintenance

Using the correct vacuum cleaner settings and keeping your device well-maintained are essential steps in reducing allergens effectively. Adjusting the vacuum’s brush settings ensures you don’t spread dust or damage surfaces. Using a high-quality vacuum filter captures tiny particles, preventing them from recirculating into the air. Regularly replacing or cleaning filters maintains suction power and filtration efficiency. Check that the brush roll spins freely and is free of hair and debris. Maintain the vacuum’s hoses and seals to prevent dust leaks. Keep the vacuum’s brushes and filters in top shape to maximize allergen removal. Proper maintenance not only improves cleaning results but also extends your vacuum’s lifespan. These measures help guarantee you’re effectively removing airborne dust and allergens during every vacuuming session.
Post-Vacuuming Steps to Minimize Residual Dust
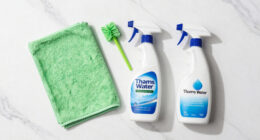
After finishing your vacuuming session, taking specific steps can substantially reduce residual dust and allergens in your environment. Start by opening windows to improve air purification and allow airborne particles to escape. Afterward, wipe down surfaces with a damp cloth to remove lingering dust, especially on furniture and baseboards. Consider using allergen barriers, like HEPA air purifiers, to continuously filter the air and catch remaining particles. Replace or empty your vacuum bag or canister promptly to prevent dust from re-entering your space. Finally, wash your vacuum’s filters regularly to maintain peak performance. These steps help ensure your environment stays as allergen-free as possible, reducing airborne dust and making your space healthier for allergy sufferers.
Frequently Asked Questions
How Often Should I Vacuum to Effectively Reduce Allergens?
You should vacuum at least twice a week to effectively reduce allergens in your home. Increasing vacuuming frequency helps remove dust, pet dander, and pollen that trigger allergies. Use a vacuum with a HEPA filter for better allergen reduction. Regular vacuuming prevents buildup and keeps airborne allergens low, especially if you have pets or allergies. Consistency is key to maintaining a healthier environment and reducing allergy symptoms over time.
Are HEPA Filters Necessary for Allergy-Friendly Vacuuming?
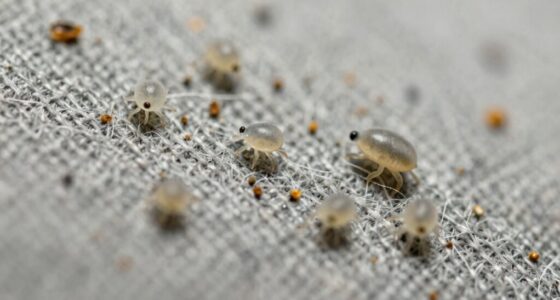
Yes, HEPA filters are essential for allergy prevention because they trap tiny allergens like pollen, pet dander, and dust mites that regular filters might miss. When you use a vacuum with a HEPA filter, you effectively reduce airborne dust and allergens, making your environment safer for allergy sufferers. Investing in a HEPA-equipped vacuum helps guarantee you’re doing everything possible to minimize allergens and improve indoor air quality.
Can Vacuuming Alone Eliminate All Airborne Allergens?
Vacuuming alone can’t eliminate all airborne allergens because of its limitations. While it helps with airborne allergen removal, some allergens, like pet dander and dust mites, can still linger in the air or settle elsewhere. To effectively reduce allergens, combine vacuuming with other strategies, such as HEPA filters, regular dusting, and proper ventilation. This multi-step approach guarantees a cleaner, healthier environment for allergy sufferers.
What Are the Signs of a Poorly Maintained Vacuum Cleaner?
Imagine you notice your vacuum isn’t picking up as much dust, and your allergies worsen. That’s a sign of a poorly maintained vacuum cleaner. Signs include reduced suction, clogged filters, or a full dust collector. Regular vacuum maintenance is essential to keep dust collector efficiency high. If these issues persist, your vacuum isn’t effectively removing allergens, so check filters, empty the dustbin, and make sure proper maintenance to improve performance.
Is It Better to Vacuum Before or After Dusting?
It’s better to vacuum after dusting because proper vacuuming techniques prevent dust from becoming airborne again. When you dust first, you loosen particles that can settle on surfaces or get sucked up later. Incorporate vacuuming into your dusting schedule to keep airborne dust levels low. This sequence minimizes allergens in your air, making your home healthier. Always guarantee your vacuum is well-maintained for ideal results.
Conclusion
As you finish vacuuming, picture the air clearing like a calm, blue sky after a storm, dust particles settling quietly into your vacuum’s bag. When you follow the right order and techniques, you create a cleaner, healthier space where allergy triggers are kept at bay. Your effort transforms your home into a sanctuary—each sweep a gentle breeze sweeping away stubborn allergens, leaving you with fresh, breathable air to enjoy.