To clean faster without cutting corners, start by decluttering each room to remove obstacles. Work from top to bottom, dusting high surfaces first, then vacuum and mop floors last. Save surfaces for the end to prevent recontamination and focus on high-traffic areas early to reduce dirt spread. Use a systematic approach, moving in circular or zigzag patterns and breaking the task into stages. Stay consistent, and you’ll master efficiency—discover more tips if you keep exploring.
Key Takeaways
- Start cleaning from the highest surfaces and fixtures to prevent dirt from falling onto lower areas.
- Tackle high-touch and high-traffic areas early to remove grime before it spreads.
- Save floors and low surfaces for last to avoid recontamination from dust and debris.
- Organize and declutter surfaces beforehand to streamline cleaning and reduce interruptions.
- Follow a consistent top-to-bottom, surface-last order tailored to each room for maximum efficiency.
Prioritize Decluttering Before Cleaning

Before you start scrubbing and sweeping, it’s essential to clear out clutter first. Clutter makes cleaning slower and less effective, so take time to organize. Use storage solutions and organizational systems to keep belongings tidy and accessible. Sort items into categories: keep, donate, or discard. Put everything back in designated spots to create a clear workspace. This step reveals hidden dirt and reduces obstacles, making subsequent cleaning easier and faster. When your space is organized, you’ll spend less time searching for tools or moving unnecessary objects. Incorporating simple organizational systems like baskets, shelves, or storage bins can help maintain order. Decluttering upfront guarantees you focus on deep cleaning instead of constantly shifting clutter, saving you time and effort in the long run. Additionally, considering the horsepower of your cleaning tools or appliances can boost efficiency, making your cleaning process even faster. Being aware of cloud service vulnerabilities can also remind you to back up important data before cleaning digital devices. To further improve your efficiency, familiarizing yourself with the history of pinball machines can inspire creative ways to organize and energize your cleaning routine, turning it into a more engaging activity. Recognizing the scientific principles behind effective cleaning can help you develop strategies that optimize your efforts. Incorporating smart home automation devices can also streamline your routine by scheduling tasks or activating cleaning tools automatically.
Tackle From Top to Bottom
Start by dusting high surfaces so dirt falls to the floor. Once everything above is clean, focus on mopping or vacuuming last. This way, you avoid re-cleaning areas and finish efficiently. Incorporating simple systems into your routine can also help you stay organized and maintain your cleaning order more easily. Establishing a habit of cleaning in this order can make your routine more consistent and prevent overlooked areas. Consistently using a systematic approach ensures thoroughness and saves time over the long run. Additionally, understanding the contrast ratio of your home theatre projector helps you prioritize cleaning in dark areas for optimal image quality. Implementing proper cleaning sequences aligned with your home’s layout can further enhance both efficiency and effectiveness.
Dust High Surfaces
To efficiently dust high surfaces, you should always begin at the top and work your way down. Start with ceiling fixtures, removing dust with a microfiber cloth or duster. Next, tackle high shelves where dust tends to settle. Use a ladder or step stool for safety and reach. Remember, dust often falls onto lower surfaces, so working from the top prevents re-cleaning. Here’s a quick overview:
| Surface Type | Tools Needed | Tips |
|---|---|---|
| Ceiling fixtures | Microfiber cloth, duster | Turn off power before cleaning |
| High shelves | Duster, cloth, ladder | Dust regularly to prevent buildup |
| Light fixtures | Extendable duster | Use gentle pressure |
| Wall-mounted decor | Soft cloth | Dust carefully around items |
Prioritizing high surfaces saves time and keeps dust from settling on lower areas. Additionally, regularly cleaning piercing jewelry and ensuring proper hygiene can prevent the buildup of bacteria and reduce the risk of infections. Incorporating European cloud solutions can also enhance data security and sustainability efforts in your cleaning or organizational systems. For example, utilizing water-efficient cleaning tools can further promote eco-friendly practices in your routine. Being aware of smart cleaning technologies can help you choose the most effective tools for faster and more thorough dusting. Using ergonomic tools designed for extended use can also help reduce fatigue during cleaning sessions.
Clean Floors Last
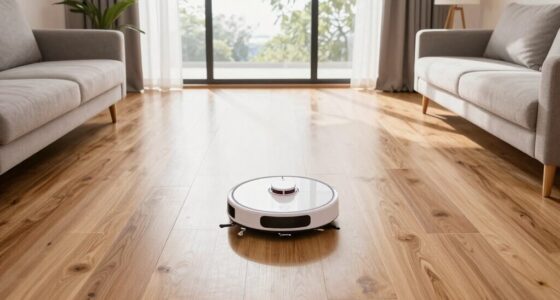
Since dust and debris tend to fall onto the floors as you clean higher surfaces, it’s best to leave the floors for last. Start with dusting and spot cleaning walls, shelves, and furniture so debris doesn’t settle on freshly cleaned floors. Once those surfaces are clear, focus on mopping the floors. Use a suitable cleaner and work in sections to ensure thorough floor mopping. This approach prevents you from spreading dust and dirt around or having to redo your work. If you notice any spots or stains during your cleaning, address them immediately with spot cleaning. By tackling high surfaces first and floors last, you keep your space cleaner longer and save time by avoiding unnecessary re-cleaning. Understanding the proper cleaning order can help reduce the spread of dust and promote a healthier environment. Incorporating smart cleaning solutions, such as robotic vacuums and mops, can further optimize your cleaning routine. Utilizing efficient cleaning practices ensures you make the most of your time and effort during each session. Additionally, using air purifiers with appropriate CADR ratings can help maintain cleaner air during and after cleaning, especially when combined with proper ventilation to reduce airborne dust and allergens.
Save Surfaces for Last
Save Surfaces for Last
By cleaning surfaces last, you safeguard their appearance and extend their lifespan. This order helps prevent recontamination, saving you time and effort in the long run. Prioritizing surfaces at the end ensures they stay cleaner and last longer. Additionally, using an air purifier can improve indoor air quality, reducing airborne pollutants that may settle on surfaces over time. Incorporating precious metals in your investment portfolio can also provide a durable safeguard against inflation and economic fluctuations. Understanding cleaning hierarchy helps optimize your cleaning routine and protect high-value surfaces effectively, especially in environments where micro-mobility solutions are used frequently.
Maximize Surface Longevity
Saving your surfaces for last during cleaning prevents unnecessary wear and preserves their appearance longer. By doing so, you guarantee that dust, spills, and cleaning residues don’t damage or stain your most delicate surfaces. Focus on organizing shelves for easier access and appliance maintenance earlier, so you won’t need to revisit these areas. When you save surfaces for last, you limit cross-contamination and avoid accidental scratches or smudges. Use this table to identify key surfaces to prioritize:
| Surface Type | Cleaning Technique | Tips |
|---|---|---|
| countertops | Gentle wipe with microfiber | Clear clutter first |
| shelves | Dust with soft cloth | Keep clutter minimal |
| appliances | Use appropriate cleaners | Avoid harsh abrasives |
| tabletops | Light polish after dusting | Save for last to prevent damage |
This approach maximizes surface longevity and keeps your home looking pristine longer.
Prevent Recontamination
To prevent recontamination during cleaning, it’s vital to prioritize surfaces last in your routine. After cleaning floors and less-exposed areas, save high-touch surfaces like countertops, doorknobs, and switches for the end. This minimizes the risk of spreading germs and prevents cross contamination. Always sanitize cleaning tools between tasks, especially when moving from dirty to clean areas, to avoid transferring bacteria.
Remember:
- Use fresh cleaning cloths or mop heads for surfaces at the end
- Sanitize tools after cleaning each room
- Avoid touching cleaned surfaces with contaminated tools
Clean High-Traffic Areas First

Focusing on high-traffic areas first can substantially speed up your cleaning routine. These spots tend to accumulate dirt buildup and surface stains quickly, making them priority targets. By tackling entryways, hallways, and kitchens early, you prevent dirt from spreading to less-used spaces. Use a damp cloth or mop to remove surface stains promptly before they set in. Addressing these areas first also means you’ll be working on the most noticeable messes when your energy is highest. This approach reduces the need for multiple passes and helps maintain a cleaner look overall. Keep in mind, cleaning high-traffic zones early prevents dirt from settling deeper and ensures your entire space looks fresher faster.
Use a Systematic Approach for Each Room
To clean efficiently, plan your route through each room to avoid backtracking. Start from the high surfaces and work down to prevent re-cleaning, and use the right tools for each task. This systematic approach helps you finish faster and guarantees no area gets overlooked.
Plan Your Cleaning Route
Creating a cleaning plan that follows a systematic route can save you time and prevent missed spots. Before you start, gather your cleaning tools so you don’t have to backtrack. Think about your cleaning schedule—what needs attention first? Planning your route involves choosing a starting point and moving logically through the room. To stay efficient, keep these tips in mind:
- Tackle high-traffic areas first to catch the most dirt early
- Clean from top to bottom to avoid re-cleaning
- Finish with the least dirty spots to avoid spreading dust or debris
Following a set route reduces the chances of overlooking surfaces and helps you complete your tasks faster. Stick to your plan, and your cleaning will be both thorough and swift.
Tackle High to Low
Have you ever noticed how dust and debris tend to settle on surfaces at different heights? To clean efficiently, start high and work your way down. Use the right cleaning tools, like microfiber cloths and extendable dusters, to reach ceiling corners, light fixtures, and shelves. Clear clutter from storage solutions before dusting, so you can access every surface easily. Tackle ceiling fans and top shelves first, then move to mid-level surfaces like countertops and tables. Finally, clean lower surfaces, including floors and baseboards. This systematic approach prevents you from re-cleaning areas and minimizes dust redistribution. By following the high-to-low order, you save time and make your cleaning more effective, ensuring every part of the room gets the attention it needs without backtracking.
Use Proper Tools
Using the right cleaning tools for each room makes your efforts more effective and efficient. Proper tools streamline your process and prevent you from wasting time or redoing tasks. When selecting a duster, consider its reach, material, and ability to trap dust—this impacts how well you clean surfaces without spreading debris. Keep your cleaning schedules in mind to ensure tools are available and ready to use when needed. To maximize efficiency, remember to:
- Choose dusters suited to the surface type and size
- Keep your tools organized and accessible
- Regularly update your cleaning schedule to match the tools you have
Utilizing the proper tools tailored for each room helps you clean faster and more thoroughly, avoiding unnecessary backtracking.
Focus on Visible and Touchable Surfaces
Focusing on visible and touchable surfaces is essential for a quick yet thorough clean. These surfaces, like countertops, tables, and appliances, show dirt accumulation more readily, so cleaning them first prevents spreading grime to other areas. Pay attention to surface texture—smooth surfaces are easier to wipe down, while textured ones may trap dust and dirt, requiring more effort. By prioritizing these areas, you ensure the most noticeable spots are spotless, boosting your cleaning efficiency. Remember, touchable surfaces often get the most use, so they tend to be dirtier and need immediate attention. Cleaning these surfaces first helps you see your progress quickly and keeps dirt from spreading to less visible areas. Focus here to streamline your cleaning routine and achieve a fresher, more inviting space.
Work in a Circular or Zigzag Pattern
Working in a circular or zigzag pattern helps you clean more efficiently by minimizing missed spots and reducing the need to retrace your steps. Using a circular motion or zigzag pattern guarantees thorough coverage, saving time and effort. When you follow this pattern, you avoid missing areas and double-back, which can slow you down. Focus on these key points:
- Maintain a consistent direction to keep your cleaning smooth.
- Use the zigzag pattern to cover large surfaces quickly.
- Switch to a circular motion for detailed, focused cleaning around edges and corners.
This approach keeps your cleaning organized and effective, allowing you to cover every inch without unnecessary repetition. Whether you’re sweeping, mopping, or dusting, a systematic pattern like this maximizes efficiency.
Clean in Stages: Dust, Vacuum, Mop
To clean efficiently, it’s best to tackle surfaces in stages—starting with dusting, then vacuuming, and finally mopping. Begin with dusting techniques to loosen and remove debris from surfaces, using a microfiber cloth or duster. Adjust vacuum power settings based on the area: lower for delicate items, higher for carpets. Vacuum thoroughly to pick up dirt and dust, moving systematically to cover every inch. Mopping comes last, ensuring floors are free of residual dust and debris.
| Dusting Techniques | Vacuum Power Settings | Final Result |
|---|---|---|
| Gentle, precise | Adjust to surface | Spotless, shiny floors |
| Reach high corners | Max for carpets | Clean, allergen-free |
| Use static cloths | Lower for delicate | Fresh, sanitized space |
Finish With Final Touches and Details
After completing the main cleaning steps, paying attention to final touches transforms a good clean into a truly spotless space. This is when detail polishing makes all the difference. Focus on small but impactful tasks that elevate your clean, such as wiping down light switches, straightening cushions, or polishing mirrors. These final touches ensure no spot is overlooked and leave your space feeling fresh and complete. To maximize efficiency, consider these key points:
- Double-check high-touch areas for germs and smudges
- Fluff pillows and towels for a polished look
- Spot clean any remaining smudges or fingerprints
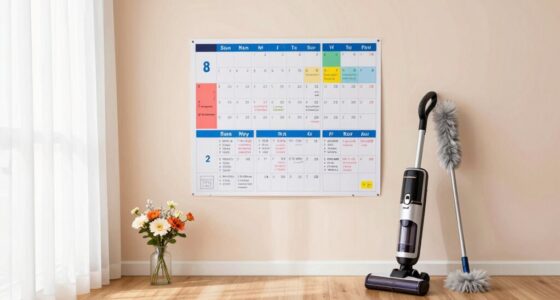
Maintain Your Routine for Efficiency
Maintaining a consistent cleaning routine is essential for keeping your space effortlessly tidy and efficient. When you stick to regular cleaning schedules, tasks become quicker and less overwhelming. Incorporate storage organization into your routine by decluttering and arranging items logically, making cleaning faster and easier. Set specific days for different chores to develop habits that prevent messes from piling up. Regularly revisiting your storage solutions guarantees everything stays accessible, reducing time spent searching for items. By committing to a routine, you avoid the chaos of sporadic cleaning and keep your home consistently neat. Over time, this approach minimizes effort, helps you stay on top of clutter, and ensures your cleaning process remains smooth and effective.
Frequently Asked Questions
How Often Should I Deep Clean Each Room for Optimal Efficiency?
You should deep clean each room every 1 to 3 months to maintain ideal efficiency. Incorporate cleaning schedules that suit your lifestyle, and stick to maintenance tips like rotating tasks and prioritizing high-traffic areas. Regular deep cleaning prevents dirt buildup and keeps your space fresh. By staying consistent with these routines, you ensure your home stays clean and organized without feeling overwhelmed, saving you time in the long run.
What Tools Are Best for Quick Cleaning Without Sacrificing Quality?
For quick, quality cleaning, use a lightweight, versatile vacuum with strong suction and adjustable settings, focusing on vacuum techniques like overlapping passes and thorough baseboard and corner cleaning. When dusting, opt for microfiber cloths or dusters that trap dirt effectively. Combine these dusting methods with targeted vacuuming, starting from the top surfaces and working downward, to save time and guarantee every area is spotless without sacrificing cleaning quality.
How Can I Stay Motivated to Stick to My Cleaning Routine?
Did you know that 80% of habits are formed through routine consistency? To stay motivated, try setting small, achievable goals and rewarding yourself when you hit them. Use motivational tips like visual reminders or playlists to make cleaning more enjoyable. Remember, maintaining a consistent routine helps build momentum, making cleaning feel less like a chore and more like a habit you naturally incorporate into your daily life.
Are There Any Common Cleaning Mistakes to Avoid?
To avoid common pitfalls and cleaning misconceptions, you should never skip dusting before vacuuming, as it spreads dirt around. Also, don’t use the same cloth for different surfaces without washing it, which can cause cross-contamination. Avoid overusing cleaning products; more isn’t always better. Finally, rushing through tasks leads to missed spots—take your time to ensure thorough cleaning, and you’ll get better results without unnecessary mistakes.
How Do I Clean Delicate Surfaces Without Damage?
To clean delicate surfaces without damage, you should use gentle cleaning techniques and prioritize surface protection. Use a soft microfiber cloth and mild cleaning solutions, avoiding harsh chemicals or abrasive scrubbers. Test any cleaner on a small, hidden area first. Always follow manufacturer instructions for specific materials, and avoid excessive moisture. By taking these steps, you guarantee your surfaces stay pristine and intact while you clean efficiently.
Conclusion
By following this step-by-step approach, you’ll clean smarter, not harder, and get your home sparkling in no time. Prioritize decluttering, tackle from top to bottom, and work systematically through each room. Remember, a little planning goes a long way—don’t put the cart before the horse. Stay consistent with your routine, and you’ll find cleaning becomes second nature. When it comes to tidying up, it’s best to leave no stone unturned for a truly spotless space.