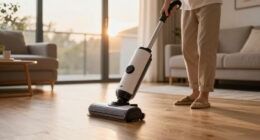

To clean your washable HEPA filter without ruining it, start by unplugging the purifier and removing the filter. Rinse it gently under lukewarm water, avoiding high-pressure sprays. If it’s particularly dirty, soak it in mild soapy water for a brief moment. Let it air-dry completely for 24 to 48 hours in a dust-free area—don’t use heat sources. Once dry, inspect for damage before reinstalling. Curious about the best maintenance practices?
Key Takeaways
- Power down and unplug the air purifier before cleaning to ensure safety and prevent damage.
- Rinse the filter gently under lukewarm or cold running water to avoid fiber deformation.
- Soak the filter briefly in mild dish soap and lukewarm water if needed, without scrubbing.
- Air-dry the filter completely for 24 to 48 hours in a dust-free area, avoiding heat sources.
- Inspect the filter for any tears or odors before reinstalling to ensure optimal function.

How often should you clean your washable HEPA filter to maintain best air quality? Generally, you should clean it every 1 to 3 months, especially if you live in a dusty area or have pets. In environments with high pollution, you might need to increase that frequency. Before you start cleaning, confirm that your filter is indeed washable by checking the product manual or labels for terms like “washable,” “rinseable,” or “permanent.” If it’s not, using water can damage the fibers and void your warranty. Proper maintenance of filters is crucial for optimal air quality considerations.
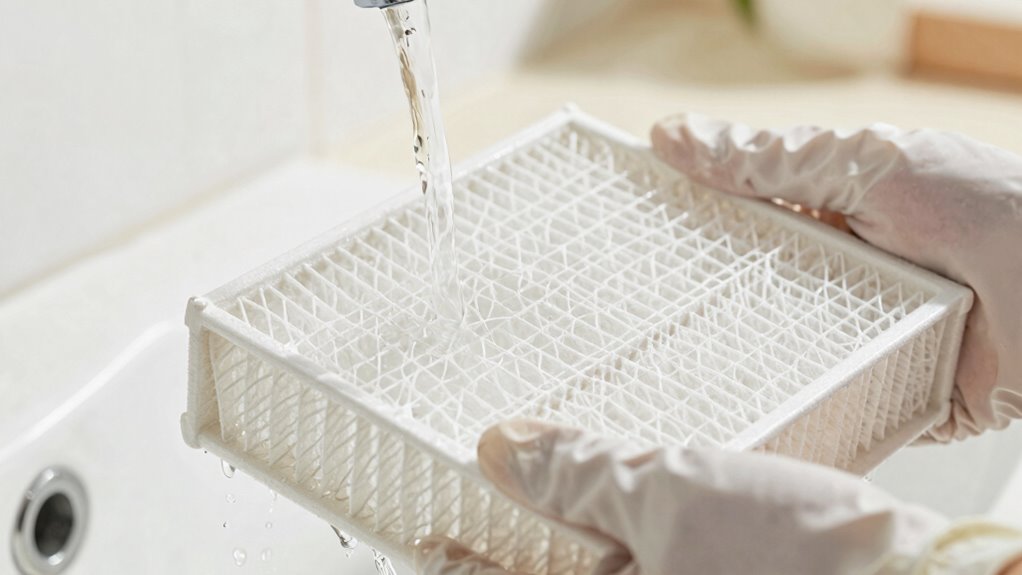
Start by powering down and unplugging your air purifier or vacuum. Wait a few minutes to allow any moving parts to stop before you remove the filter. If there are outer prefilters or charcoal layers, remove those first and clean them separately according to manufacturer instructions. It’s best to work in a well-ventilated area or outdoors to avoid reintroducing dust into your living space. A dust mask and gloves are handy to protect yourself from allergens during this process. Clogged filters can also lead to reduced system performance and increased noise, so regular maintenance is essential.
When you’re ready to clean, gently rinse the filter under lukewarm or cold running water from the clean side to push debris away. Avoid using high-pressure sprays; they can deform the fibers. If allowed, a brief soak in a basin of lukewarm water with mild dish soap can help dislodge grime. Just remember to agitate gently—no scrubbing or high shear force, as it can stretch or break the fibers. After rinsing, shake off excess water and prepare for drying.
Air-dry the filter completely for 24 to 48 hours in a dust-free area with good airflow. Don’t use heat sources like hair dryers or direct sunlight, as they can warp the frame and damage the filter media. Once dry, inspect the filter for any tears, odors, or discolorations. If you notice any issues, it’s time to replace the filter rather than risk lowered filtration efficiency.
After confirming it’s in good shape, reinstall the filter correctly, ensuring you follow any specific order for prefilters or charcoal layers. Run the purifier briefly to check for normal airflow and any unusual noises. If everything checks out, you’re good to go, ensuring your air quality remains high with a well-maintained HEPA filter.

USANOOKS Microfiber Cleaning Cloth Grey - 12 Pcs (12.5"x12.5") - High Performance - 1200 Washes, Ultra Absorbent Microfiber Towel Weave Grime & Liquid for Streak-Free Mirror Shine - Car Washing Cloth
10x GRIP-ROOT WEAVE - TRAP MORE, WORK LESS: Ultra-absorbent microfiber towels for car Grip Root weave works like...
As an affiliate, we earn on qualifying purchases.
Frequently Asked Questions
Can I Use Soap for All Washable HEPA Filters?
You can’t use soap for all washable HEPA filters. Before applying any soap, check the manufacturer’s guidelines to see if it’s permitted. Some filters allow a mild, low-suds dish soap, while others may require just water. Using soap on filters that aren’t designed for it can damage the fibers and void warranties. Always verify you’re following the specific cleaning instructions for your filter type to maintain its effectiveness.
How Often Should I Check My Filter for Damage?
You should check your filter for damage every month, especially in homes with pets or high dust levels. Remarkably, studies show that HEPA filters can lose up to 50% of their efficiency after just a few months of use. Inspect for tears, crushed pleats, or persistent odors during these checks. If you notice any significant issues, it’s best to replace the filter to ensure your air quality remains at its best.
Are There Specific Tools Recommended for Cleaning?
Yes, you’ll need a few specific tools for cleaning. Gather a soft brush, low-suds dish soap (if allowed), a basin for soaking, and cold or lukewarm water. You might also want towels for drying and personal protective equipment, like gloves and a dust mask, especially for very dirty filters. Having these items ready will make the cleaning process smoother and help you avoid damaging your filter.
What if My Filter Has a Persistent Odor After Cleaning?
If your filter has a persistent odor after cleaning, it’s best to replace it. Odors often indicate trapped contaminants or mold growth that cleaning can’t eliminate. Inspect the filter for any signs of damage or decay. If it’s structurally sound but still smells, it’s reached the end of its useful life. Always follow the manufacturer’s guidelines for replacement intervals to maintain ideal air quality in your home. Don’t hesitate; your air quality matters!
Can I Clean My HEPA Filter Outdoors in Winter?
Yes, you can clean your HEPA filter outdoors in winter, but be cautious. Imagine struggling to breathe in your chilly garage while trying to clean a dirty filter. If temperatures drop too low, moisture can freeze and damage the filter. Choose a mild day, and make sure you have a sheltered area to avoid direct exposure to extreme cold. Always remember to air-dry the filter completely before reinstalling it to prevent mold growth.

Amazon Basics Microfiber Cleaning Cloths, Ultra Absorbent, Lint Free, Streak Free, Non-Abrasive, Reusable and Washable, 16" x 12", Blue/White/Yellow, Pack of 24
Microfiber 16 x 12-inch cleaning cloth (24-pack); ideal for cleaning cars, trucks, boats, and more
As an affiliate, we earn on qualifying purchases.
Conclusion
Now that you know how to clean your washable HEPA filter, imagine the clean air flowing through your home, free of dust and allergens. Picture yourself taking a deep breath, feeling the difference as you make sure your filter remains in top shape. But wait—before you jump in, remember those essential steps. One wrong move could leave your filter damaged. So, gather your supplies and prepare for a revitalizing transformation, but tread carefully—you wouldn’t want to ruin your hard work!

10 Pack Microfiber Cleaning Cloths, Large 30" x 16" Absorbent Streak Free Lint Free Washable Reusable Towels for Floor Mop, Kitchen, Car, Windows, Glass, Stainless Steel, Multi-Purpose Rags, Blue
EXTRA LARGE SIZE: Each microfiber cleaning cloth measures a generous 30" x 16", providing more coverage for faster,...
As an affiliate, we earn on qualifying purchases.
Kenmore 81414 400 Series Pet Friendly Lightweight Bagged Canister Vacuum with Extended Telescoping Wand, HEPA, Retractable Cord, and 4 Cleaning Tools-Red
BAGGED CANISTER VACUUM: Designed to clean all areas and surfaces of your entire home, den, kitchen, car or...
As an affiliate, we earn on qualifying purchases.