If your cordless vacuum won’t charge, start by turning it off and unplugging it. Remove the battery carefully, inspecting for damage or corrosion, and clean the contacts with a soft cloth. Perform a basic reset by waiting a few minutes before reinstalling the battery securely. Also, verify the charging port is clean and the contacts are free of debris. Follow these steps, and you’ll discover more tips to fix your vacuum effectively.
Key Takeaways
- Power off and unplug the vacuum before removing the battery to prevent electrical issues.
- Carefully inspect the battery and charging contacts for damage, corrosion, or debris.
- Clean charging contacts and port with a soft cloth to ensure proper electrical connection.
- Wait several minutes after removing the battery to allow internal components to reset before reinstallation.
- Reinstall the battery securely, then turn on the vacuum to test if charging issues are resolved.

USANOOKS Microfiber Cleaning Cloth Grey - 12 Pcs (12.5"x12.5") - High Performance - 1200 Washes, Ultra Absorbent Microfiber Towel Weave Grime & Liquid for Streak-Free Mirror Shine - Car Washing Cloth
10x GRIP-ROOT WEAVE - TRAP MORE, WORK LESS: Ultra-absorbent microfiber towels for car Grip Root weave works like...
As an affiliate, we earn on qualifying purchases.
Power Down and Unplug the Vacuum
Before attempting to reset your cordless vacuum’s battery, make sure to power it down completely and unplug it from the wall. This step is vital to prevent any electrical issues and protect your device’s battery lifespan. When the vacuum is off and disconnected, check the charging indicators—if they’re still blinking or showing unusual lights, it’s a sign the battery needs a reset. Powering down completely ensures no power runs through the system, which can interfere with the reset process. It also helps you accurately assess the charging indicators once you restart. Remember, a proper reset can improve battery performance and extend its lifespan. Skipping this step might lead to inaccurate readings or faulty resets, so take the time to turn off and unplug before proceeding. Additionally, understanding your device’s battery management features can help optimize its battery longevity and performance over time. Regularly updating your device’s firmware and software can also help maintain optimal battery health and fix known issues. Recognizing the importance of proper reset techniques can save you time and prevent further battery problems.

Amazon Basics Microfiber Cleaning Cloths, Ultra Absorbent, Lint Free, Streak Free, Non-Abrasive, Reusable and Washable, 16" x 12", Blue/White/Yellow, Pack of 24
Microfiber 16 x 12-inch cleaning cloth (24-pack); ideal for cleaning cars, trucks, boats, and more
As an affiliate, we earn on qualifying purchases.
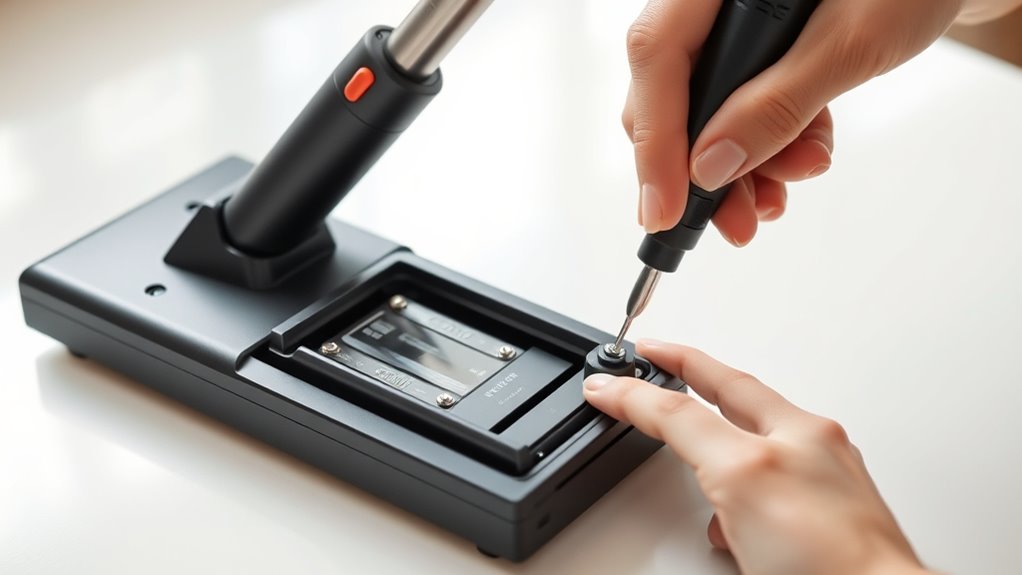
Remove the Battery and Inspect for Damage

Carefully remove the battery from your vacuum and hold it in your hands. Examine it closely for any signs of damage, like cracks, leaks, or corrosion. Identifying visible issues early can save you time and help you determine if it needs replacement. Additionally, inspecting the essential oils for device maintenance can provide insights into proper care and prolong the battery’s lifespan. Regularly checking the battery health can also prevent unexpected failures and extend the overall lifespan of your vacuum’s power source. Understanding battery maintenance practices can further help in maintaining optimal performance and avoiding charging issues. For instance, being aware of regional climate effects can influence how you store and care for your battery, especially in areas with high humidity or temperature fluctuations.
Detach and Examine Carefully
To inspect the battery properly, start by removing it from the vacuum. Check the battery capacity by noting the charging indicator; a weak or inconsistent light can signal issues. Examine the terminals for any dirt, corrosion, or loose connections that could affect charging. Make sure the battery sits securely in its compartment and that the contacts are clean and intact. If the charging indicator isn’t lighting up or is flickering, it might point to a faulty battery or connection problem. Avoid handling the battery roughly to prevent damage. Carefully inspect the entire battery for any signs of swelling, cracks, or corrosion, which could indicate internal damage. This thorough check helps determine if the battery itself needs replacement or if you should explore other troubleshooting steps. Additionally, understanding the battery’s capacity can help assess whether it still holds a proper charge or needs replacement. Checking the battery’s internal condition can also reveal hidden damage that isn’t immediately visible. Regularly inspecting the battery’s internal components ensures early detection of potential issues that could compromise its performance. It’s also helpful to consult the manufacturer’s guidelines for specific troubleshooting steps related to your vacuum model.
Look for Visible Damage
Remove the battery from your cordless vacuum and hold it in a well-lit area. Carefully inspect the battery for any visible damage, such as cracks, bulges, or burns. Look closely at the terminals for signs of corrosion or discoloration, which can indicate internal corrosion. Check the casing for warping or leaks that suggest the battery has been compromised. Visible damage can prevent the battery from charging properly or cause safety issues. If you notice any cracks, corrosion, or other damage, it’s best to replace the battery rather than attempt to repair it. Internal corrosion or physical damage compromises the battery’s performance and safety, so addressing these issues early can save you time and prevent further damage to your vacuum.

10 Pack Microfiber Cleaning Cloths, Large 30" x 16" Absorbent Streak Free Lint Free Washable Reusable Towels for Floor Mop, Kitchen, Car, Windows, Glass, Stainless Steel, Multi-Purpose Rags, Blue
EXTRA LARGE SIZE: Each microfiber cleaning cloth measures a generous 30" x 16", providing more coverage for faster,...
As an affiliate, we earn on qualifying purchases.
Perform a Basic Battery Reset
Start by turning off your device completely to guarantee safety. Carefully remove the battery and wait a few minutes before reinserting it. This simple reset can often resolve minor performance issues without further steps. Additionally, ensuring your device is free from obstructions can help maintain proper battery contact and charging efficiency. Regularly inspecting your device for dust or debris can also improve overall battery performance and longevity. Keeping the charging port clean and free of corrosion can further enhance charging success. Using appropriate charging methods and avoiding overcharging can help preserve your battery’s health over time. Also, periodically checking the battery contacts for corrosion or damage can support consistent charging.
Power Off Device
Turning off your cordless vacuum is an essential first step in resetting the battery. By powering down the device, you give the charging indicator a moment to reset, which can help clear any temporary glitches affecting charging. Make sure to switch off the vacuum completely and disconnect it from any charging dock or outlet. This prevents ongoing power flow that could interfere with the reset process. Turning off the device also helps preserve the battery’s lifespan by avoiding unnecessary drain. Once powered down, wait a few moments before proceeding to the next steps. A simple power off can often resolve minor issues, ensuring your vacuum’s internal systems are ready for a more thorough reset if needed. Proper battery maintenance can extend the overall lifespan of your device. Additionally, taking these precautions can prevent battery deterioration caused by improper handling. Being mindful of storage conditions can also help maintain battery health over time. Ensuring proper charging habits is vital for long-term battery performance. This step sets the foundation for better battery performance and can help prevent charging problems in the future.
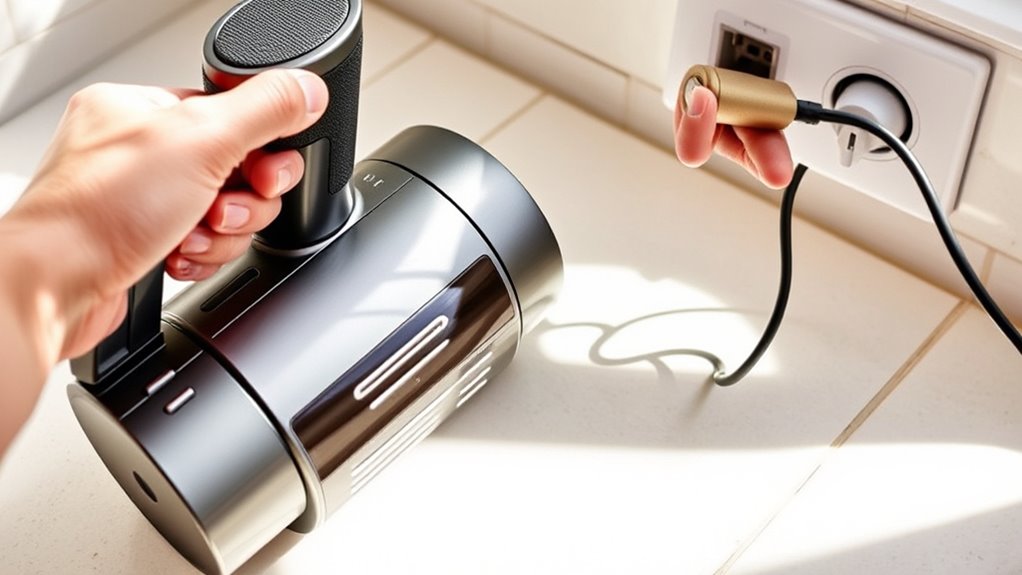
Remove Battery Carefully
To perform a basic battery reset, carefully detach the battery from your cordless vacuum. During battery removal, prioritize safe handling to avoid damage or injury. Turn off the device first, then locate the battery compartment. Use gentle pressure to release any latches or sliders holding the battery in place. Avoid forcing the battery out, as this could damage connectors or the device itself. Handle the battery by its edges, keeping your fingers clear of contacts or circuitry. Once removed, set it on a non-conductive surface. Proper battery removal ensures you won’t accidentally cause a short circuit or other issues during resetting. Taking your time and handling the battery safely helps maintain your vacuum’s longevity and prepares it for the reset process. Additionally, understanding the thermal behavior of batteries can help prevent overheating issues during reassembly.
Wait Before Reinstalling
Waiting a few minutes after removing the battery allows any residual charge to dissipate and gives the device’s internal components time to reset. This pause guarantees that when you reinstall the battery or perform a battery replacement, the vacuum’s electronics are properly synchronized. During this time, avoid reconnecting the battery to the charging station, which helps prevent potential power surges. Use this brief wait to inspect the battery contacts and charging port for debris or corrosion. Here’s a quick overview:
| Step | Action | Purpose |
|---|---|---|
| Remove battery safely | Disconnect from vacuum | Prevent electrical issues |
| Wait 5-10 minutes | Allow components to reset | Clear residual charge |
| Inspect contacts | Check for dirt or corrosion | Ensure proper connection |
| Reinstall battery | Reattach securely | Prepare for charging or testing |
| Reconnect to charging station | Confirm proper fit | Restart charging process |
This step helps guarantee your battery replacement or reinstall leads to effective charging.

10pcs HEPA Filters Replacement for ILIFE V3s V3s pro V5 V5s V5s Pro V5s Pro 2 V5s Plus Noisz S5 Robotic Vacuum Cleaner ILIFE V3s pro Filters ILIFE Robot Vacuum Filter
Hepa filters for Ilife Vacuum model V3, V3s V3s pro V5 V5s V5s Pro Vacuum Cleaning Robot. Ilife...
As an affiliate, we earn on qualifying purchases.
Reinstall the Battery Properly

Before you reinsert the battery, make sure the vacuum is turned off and unplugged for safety. Properly reinstalling the battery is essential for good battery maintenance and peak performance. Align the battery with the designated slots, ensuring it fits snugly without forcing it. Check that the charging accessories, like the charger and connectors, are clean and undamaged, as this helps maintain a secure connection. Avoid leaving the battery loose or improperly seated, which can prevent the vacuum from charging correctly. Once in place, press firmly until you hear a click or feel it lock into position. Ensuring the battery is correctly installed helps prevent charging issues and prolongs its lifespan. Proper reinstallation is a simple step that makes a big difference in your vacuum’s overall performance.
Clean the Charging Contacts and Port

Have you noticed your cordless vacuum isn’t charging as efficiently as it used to? Dust buildup around the charging port and contacts can block proper electrical flow, preventing a full charge. Start by unplugging the vacuum, then carefully inspect the charging port for debris. Use a soft cloth or a small brush to gently remove dust and dirt from the contacts and port. Avoid using water or harsh cleaners, as moisture can damage the electronics. Ensuring the contacts are clean helps establish a solid connection between the charger and the battery. After cleaning, reconnect everything and give the vacuum a test charge. Proper maintenance of the charging contacts and port can substantially improve charging performance and help resolve common charging issues.
Test the Vacuum After Resetting
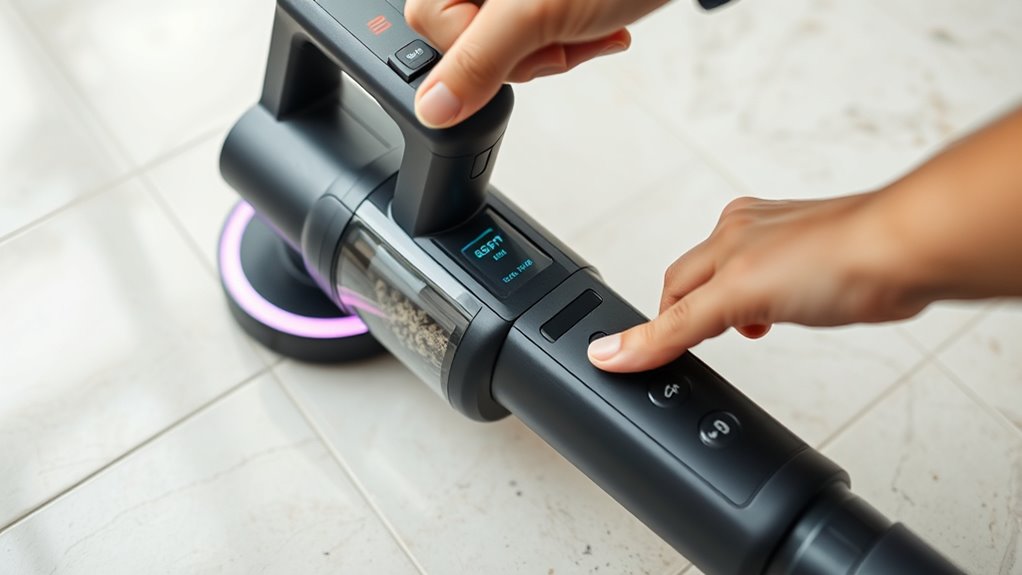
Once you’ve reset the battery, it’s essential to test the vacuum to verify it’s functioning properly. Turn it on and observe the charging indicator; it should illuminate or blink as expected. Listen for consistent motor sounds and check if suction has returned to normal. This step confirms whether the reset improved battery performance and if the battery lifespan is intact. Use the table below to understand how different indicators relate to your vacuum’s health:
| Indicator Status | Meaning |
|---|---|
| Charging indicator is solid | Battery is charging properly |
| No indicator or blinking | Possible reset or connection issue |
| Battery doesn’t hold charge | Battery lifespan may be reduced |
If issues persist, consider replacing the battery to maintain ideal performance.
Frequently Asked Questions
How Often Should I Reset My Vacuum Battery?
You should reset your vacuum battery only when you notice a decrease in battery lifespan or if charging cycles seem to be affected, typically every few months. Resetting helps recalibrate the battery, ensuring peak performance. Avoid frequent resets, as it can stress the battery. Instead, monitor how your vacuum’s battery holds a charge and reset only when necessary to maintain healthy charging cycles and extend its overall lifespan.
Can a Damaged Battery Still Be Reset?
A damaged battery usually can’t be reset effectively. If your battery is physically compromised or no longer holds a charge, consider battery replacement instead. Resetting a damaged battery won’t restore its functionality and can be unsafe. Once you replace the battery, remember to recycle the old one properly through battery recycling programs. This ensures environmental safety and helps prevent potential hazards from discarded batteries.
What Tools Do I Need for Battery Inspection?
Think of your battery inspection as a detective’s toolkit—you’re the investigator. You’ll need a multimeter to measure voltage and check for life signs, a screwdriver to open the casing safely, and possibly a pair of gloves for protection. These tools are your allies in revealing whether the battery’s hidden issues are repairable or if it’s time for a replacement. With them, you’ll uncover the truth behind your cordless vacuum’s charging woes.
How Long Does a Typical Reset Process Take?
A typical reset process takes about 5 to 10 minutes, depending on your vacuum model. You should do this reset regularly to extend your battery lifespan and maintain ideal performance. Resetting too often isn’t necessary—once every few months is sufficient. This quick step can resolve charging issues and help you avoid more costly repairs, ensuring your cordless vacuum stays in good shape and works efficiently.
Is It Safe to Reset the Battery Myself?
Yes, it’s generally safe to reset the battery yourself if you follow the manufacturer’s instructions carefully. However, you should consider battery safety and reset risks, such as potential overheating or damage. Always disconnect the vacuum from power before resetting and avoid using sharp objects. If you’re unsure, consult the user manual or seek professional advice to prevent accidents or voiding warranties. Your safety should always come first.
Conclusion
So, there you have it—your cordless vacuum’s grand reset saga. Because nothing says “clean” like a battery that needs a gentle nudge to remember its purpose. Follow these steps, and maybe, just maybe, your vacuum will stop playing hard to get. After all, who knew that fixing a charging issue was as simple as a battery spa day? Now go on, get that dust buster back to its glorious sucking glory.